Providing a variety of flavours and experiences, vaping has grown to be a somewhat popular substitute for conventional smoking. Still, one of the most often occurring problems vapers deal with is a blocked vape pod. When your device isn’t providing the expected smooth pull, it might be aggravating. Not to worry! This guide will show you through how to unclog a vape pod so you may quickly resume loving your preferred e-liquid.
Why Clogs a Vape Pod?
- A vape pod could get clogged for several reasons. The most frequent offenders are:
- E-Liquid Residue: Over time e-liquid can leave behind a sticky residue clogging the pod.
- Dust, lint, and other particles can find their way into your gadget and obstructions result.
- Incorrect storage of your vape pod could cause leaks and clogging.
- Knowing the basic reason will enable one to solve the problem with efficiency.
Your Vape Pod’s Clogged Signs
One must first recognize the signs of a clogged vape pod before diving into fixes. Typical symptoms are:
- Your device may be clogged if its regular vapour output is lower than expected.
- Hard Draw: You most certainly have a blockage when you have to inhale harder to produce any vapour.
- Unusual noises during use can point to a clogged gurgling sound.
- Knowing these indicators will enable you to quickly clear your vape pod.
- Ignoring a Clogged Vape Pod: Risks
- Ignoring a choked vape pod could cause a number of problems, including:
- Extended clogs might strain your equipment and maybe result in irreparable harm.
- Bad Vaping Experience: A blocked pod might produce uneven and unsatisfactory vapours.
- Stagnant e-liquid can provide a habitat for germs, so causing health hazards.
- Taking quick care of clogs guarantees improved vaping experience and extends the life of your equipment.

Getting Ready to Clear Your Vape Pod
- Get the following tools ready to streamline the unclogging of your vape pod:
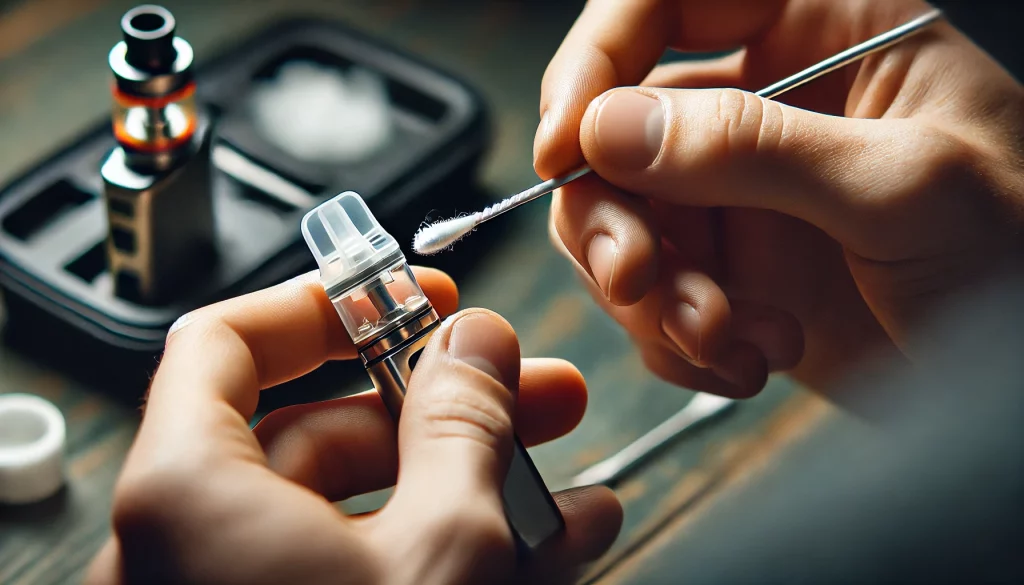
- Cotton swabs are handy for spotless cleaning of little spaces.
- Paper towels help to absorb extra liquid and clean away residue.
- Perfect for cleaning and disinfection isopropyl alcohol.
- Compressed air can assist to blow trash from confined areas.
- Having these instruments close by will help the unclogging process run more quickly.
Safety Notes
Safety has to always come first. Use these warnings:
- Make sure your vaping device is turned off before doing any cleaning.
- Work in a well-ventilated area to assist avoid breathing in cleaning chemical’ vapours.
- Handle liquids carefully; avoid coming into touch with cleaning chemicals and e-liquids.
- Remembering these safety precautions can help you and your equipment be safe during the unclogging operation.
Break Your Vape Pod apart.
- Start by disassembling your vape pod. Usually, this consists of:
- Taking out the pod from the primary device, gently separate it.
- If at all possible, separate the mouthpiece to reach the internal parts.
- Cleaning empties Remain E-Liquid and dispose of any extra correctly.
- By disassembling your vape pod, you may easily access congested regions and do complete cleaning.
Detailed Guide on Unclogging a Vape Pod
Maintaining the Mouthpiece: Cleaning
Usually first checked for obstructions is the mouthpiece. Please follow these guidelines:
- Look for any obvious residue or trash on the mouthpiece.
- Dampen a cotton swab with isopropyl alcohol then clean the inside of the mouthpiece.
- Rinse the mouthpiece gently with warm water then fully dry it.
- Maintaining a clean mouthpiece will help to greatly increase airflow and vapour generation.
Opening the Pod’s Airflow Channels
Turn now to the pod’s airflow channels:
- Blowing out any obvious trash using a compressed air can is easy.
- Remove any e-liquid residue from the channels by wiping with paper towels.
- Look for blockages to be sure none remain.
- Clearing the airflow channels keeps the draw constant and smooth.
Cleaning the pod
Rinsing the pod helps to clear tough residue:
- Rinse with warm water; hold the pod under gentle flowing water to clear any residue.
- Gently shake the pod to eliminate as much extra water as you can.
- Use paper towels or leave the pod to totally air dry.
- Good rinsing guarantees that your pod is clear of any residual residue likely to cause obstructions.
- Rebuilding and Testing
- Rejoin Parts
- Reassembling comes first once the pod is dry and clean:
- Reinstall the mouthpiece so it rests back on the pod securely.
- Reinstall the pod within the main device.
- Make sure all parts are securely in place to prevent leaks by means of tight fit.
- Perfect performance depends on correct reassembly.
Perform a test draw
Do a test draw before loading e-liquid:
- Take a few draws without running the device to assess airflow.
- Listen for sounds to be sure there are no whistling or gurgling.
- Look for resistance; ensure the draw feels free and unhindered.
- Testing the draw guarantees that your gadget is running as it should and the blockage is cleared.
Load and Vape
Refill your pod once everything is set up:
- Load the pod with the e-liquid of your choice.
- Prime the coil by letting it soak up the e-liquid for few minutes.
- Start vaping by turning on power on your gadget and enjoy flawless vaping.
- These actions guarantees that your vape pod is ready for use.
- Stopping upcoming clogs
Typical Maintenance Advice
- Prevent obstructions by consistent maintenance.
- Make it a habit to weekly clean your vape pod.
- Store correctly; keep your gadget straight to stop leakage.
- Use Quality E-Liquid: Choose premium e-liquids with less residue left.
- Regular maintenance keeps your vape pod in best shape.
Track E-Liquid Content.
- Look at your e-liquid levels.
- Refill Time: Steer clear of allowing your pod run empty.
- Look for any sediment in your e-liquid that would create clogs.
- Shake Before Use to guarantee consistent distribution of your e-liquid.
- Monitoring e-liquid levels will help you avoid blockages and improve your vaping experience.
Replace Components as Needed
- Replace worn-out parts without delay.
- Replace coils every few weeks to preserve taste and vapour generation.
- Inspect Pods for Damage: Look for leaks or cracks in your pod; if needed, replace.
- Improve When Needed: If your present one often clogs, think about switching to a newer one.
- Frequent replacements guarantees a flawless and fun vaping experience.
In summary
Though they can be annoying, clogged vape pods are easily fixed with the correct method. You may rapidly unclog your vape pod and resume enjoying your preferred e-liquid by knowing the causes and following our exacting guide. To stop future clogs, keep your gadget routinely maintained and check e-liquid levels.
Please contact our community of vape aficionados if you require further advice or help. Have fun vaping!


