With a better and more personalized experience, vaping has grown to be a common substitute for smoking. Still, regular cleaning of your vape pod is crucial to guarantee a good vaping experience and to maintain it running effectively. We will walk you through the process of cleaning a vape pod in this blog article, explain why maintenance and health depend on each other, and offer ideas to maximize your device. This tutorial will help you keep your vape pod in perfect shape regardless of experience level—new or seasoned.
Why Maintaining Cleanliness of Your Vape Pod Matters Preventing Development and Residue
Regular cleaning helps to avoid buildup and crud that could compromise the flavour and performance of your vape. E-liquid can eventually leave deposits that clog the pod and lower its effectiveness. Maintaining cleanliness of your vape pod guarantees a more delicious and seamless vaping experience.
Extending the Vape Pod’s Life
A fresh vape pod runs longer and more effectively. Regular maintenance helps to avoid problems including battery faults, burned coils, and leaks. Long-term cost savings will result from avoiding regular replacements by spending time to maintain your gadget.
Medical Advantages
Vaping with a filthy pod could cause one to inhale dangerous chemicals. Build-up of residue could include germs and other pollutants. Regular cleaning guarantees that, for your health and safety, you are breathing pure vapour.
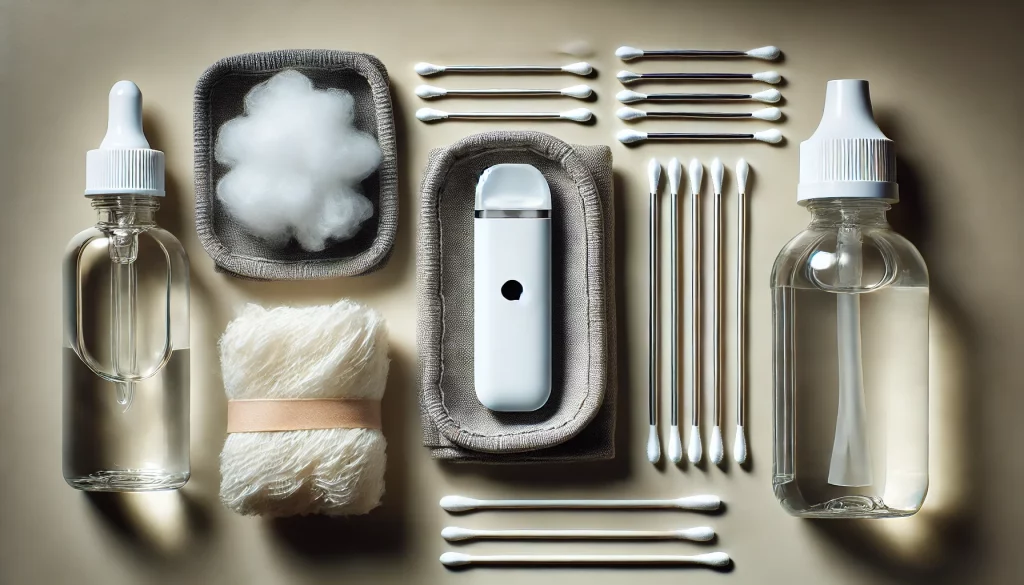
Organizing Your Cleaning Tools and Basic Ingredients
Check you have the required cleaning supplies before you start. You will need:
- Isopropyl alcohol:
- Cotton brushes
- Microf fibre cloth or paper towels
- Warm water:
- A minor brush
- Unneeded Instruments
You might want to take a more comprehensive clean using:
- For hard-to-reach places, a toothpick or needle
- Compressed air for blowing trash out
- a gentle toothbrush for cleaning
- Pre-cleaning Getting Ready
Turn off and detach your vape pod from any power source. Take off the pod from the gadget and remove any last e-liquid from it. This will simplify and guarantee safer the cleaning process.
Crashing Your Vape Pod
Elimuting the Pod
Take great care removing the pod from the gadget. Your model may call for only pulling the pod out or pushing a button. If in doubt, go to your user manual.
Separating Elements
Break out the pod’s several components—the mouthpiece, coil, and tank among other things. Track every element to guarantee none disappears during the cleaning process.
Investigating Damage
As you disassemble, look for damage or wear on every component. Look for burned coils, leaks, or cracks. To keep best performance, replace any broken components.
Oral Hygiene: Mouthpiece Cleaning
Rinsing Under Warm Water
Rine the mouthpiece under warm water first. This will clear any residual mess and loose trash. Use care to not damage the part.
Making Use of Isopropyl Alcohol
Clean the mouthpiece’s inside and outside completely by dipping a cotton swab in isopropyl alcohol. Alcohol will clean any tough residue and sterilize.
Mouthpiece Drying
Dry the mouthpiece with a paper towel or microfiber cloth. Before reassembling it with the other parts, ensure sure it is totally dry.
Tank Cleaning Emptying and Rinsing
Empty the tank’s leftover e-liquid. To get last traces of e-liquid, warm water rinses the tank. Take great care but also be diligent to prevent tank damage.
Inside Brushing
Inside the tank, scrub using a small brush or toothbrush. This will guarantee the tank is clean and eliminate any accumulation.
Drying the Tank
Clean the tank with a microfiber cloth or paper towel. Make sure it’s absolutely dry before adding e-liquid once again.
Purifying the Coil
Knowing Various Coil Types
Among the several varieties of coils are rebuildable and replacement ones. Knowing your sort of coil will enable you to more thoroughly clean it.
Rinsing and Drying
Rinse under warm water then let replaced coils thoroughly dry. Disassemble and immerse rebuildable coils in isopropyl alcohol; then rinse and dry.
Examining and replacing
Look for burn- or wear-related indicators on the coil. Replace a broken or burned coil to keep your vaping experience in quality.
Examining the Battery Connection
Employing a Cotton Swab
Clean the battery connection points by swabs dipped in isopropyl alcohol. This will eliminate any residue capable of compromising the pod’s and the device’s connection.
Looking for Corrosion Examine the battery connection for indications of corrosion. If you see corrosion, gently wipe it with an alcohol-dipped cotton swab.
Promoting a Close Relationship
Verify a strong and unbroken battery connection. This guarantees your vape pod’s consistent and effective power source.
Reconfiguring Your Vape Pod
Reassemble your vape pod after every component is dry and clean. To guarantee everything is put back exactly, follow the reverse order of disassembly.
Refilling using E-Liquid
Top the tank with your choice e-liquid. Steer clear of leaks and spills by not overfilling the tank.
Turning On: Authority
Turn on your vape pod and check everything is running as it should by doing a few test puffs. Savish the fresh, pure taste of your e-liquid.
Advice for Preserving a Clean Vape Pod
Frequent Cleaning Plan
Plan regular cleaning depending on your frequency of using your vape pod. A weekly purge is advised for heavy users. Bi-weekly or monthly cleaning might be plenty for occasional users.
Corrective Storage
Keep your vape pod somewhere dry and clean. Steer clear of intense sunlight and very high temperatures since these will compromise the lifetime and functionality of your equipment.
Maintaining Information
Learn about best measures for preserving your vape pod. Join internet communities for guidance and follow manufacturers’ instructions.
Typical Errors to Prevent Ignoring Regular Maintenance
Ignoring frequent cleaning could cause accumulation and lower performance. Give cleaning your vape pod top attention to guarantee the greatest vaping experience.
Applied Harsh Chemicals
Steer clear of strong chemicals that would ruin your vape pod. For good and safe cleaning, stick to warm water and isopropyl alcohol.
Ignoring symptoms of wear and tear could cause more major issues. Check your vape pod often and take quick care of any problems to prevent expensive replacements or repairs.
FAQs Regarding Vape Pods’ Cleaning
When should I clean my Vape Pod?
Your use will determine how often you clean. While infrequent users might clean their vape pod bi-weekly or monthly, heavy users should do so frequently.
Can I clean my vape pod with regular water?
While rinsing can be done with ordinary water, isopropyl alcohol is advised for a complete cleanliness and disinfection.
Should my Vape Pod still taste burned even after cleaning?
Should your vape pod still taste burnt after cleaning, the coil may have been broken and requires replacement. Check the coil; if needed, replace it.
Finish
Guaranturing a good and healthy vaping experience depends on keeping a clean vape pod. Following the advice in this guide will help you to maintain the best condition of your vape pod, increase its lifetime, and let you experience the whole flavour of your e-liquids. Don’t forget to keep updated about proper practices, routinely clean your vape pod using the correct cleaning tools. Think about becoming part of our community of vape aficionados for further ideas and professional help. glad you’re vaping.